Pizza for breakfast???

While it’s always good to enjoy leftover pepperoni pizza the morning after a rough night, what we’re making today is a pizza of breakfast foods.  With whatever you have in the fridge and some naan, you can easily make a personal-sized breakfast pizza.

Naan is an Indian flat bread that is similar to a gordita from Taco Bell, and it’s an easy crust for this quick pizza.  Place the naan on a baking sheet – one per person.  Preheat the oven to 350 degrees.  In a pan, saute the toppings for your pizza.  You can get creative here, and this is a great opportunity to clean out the fridge.  Make use of the leftover vegetables, or the half of something that you needed for another recipe.  For this time, I use bacon (about 5 strips diced), green onions, a yellow bell pepper, and mushrooms.

Spread the cooked veggies and bacon on the naan and then sprinkle with shredded cheese.  Crack two or three eggs (depending on the size of your pizza) on top.  Be careful not to drip over the sides – it helps to pile the toppings a little heavier around the edge to serve as a levy for the running egg whites.  Sprinkle with pepper if you like, and place in the oven for about 25 minutes or until the eggs reach your preferred doneness.

Enjoy!

What to do (eat) with a cold, rainy day?

If you’re in NYC, you woke up on Sunday, October 7, to realize that it’s actually Fall now and it’s cold outside.  All you wanted to do is pull the covers over your head and stay inside for the day.  The Sundays of al fresco brunch are over, so hopefully you’re prepared with a few simple ingredients to throw together a classy meal at home while you stare outside at the poor folks in their scarves.  If you weren’t checking the weather forecast with eager anticipation of a cold, rainy Fall day of staying inside, then bundle up and run to your grocery store for these four items:

  • Bread (a sliced sourdough would work perfectly)
  • Ham (thinly sliced)
  • Cheese (something that will melt and have flavor – I’d recommend a gruyere or fontina)
  • Eggs

If you guessed “grilled cheese with ham” then you are sort of correct.  If you paid attention to the menu at your last brunch, they called this “croque madame,” or “croque monsieur” without the eggs.  It sounds much more impressive that way, but don’t be intimidated.

Brush one side of each slice of bread with olive oil or melted butter (or a combination of both) and place it on your clean work surface.  If you have dijon mustard laying around, that would be a nice addition, so start with spreading that one the other side of one slice.  Add on your ham and cheese, and place the other slice of bread on top with the oiled side facing out.

Heat your oven to 350 and warm an oven-safe saute pan and place your fancy French grilled cheese in the pan.  Brown one side and then flip.  Put the pan into the oven for ten minutes or so to heat the sandwich all the way through.  If you want to skip the oven step (or don’t have an oven-safe pan) just keep the flame very low and watch closely so you don’t burn the bread.  You can lid the pan to encourage the insides to heat more quickly.

Remove the finished sandwich from the pan and add a little oil or butter and return to the flame.

Crack one or two eggs and cook to your desired doneness.  If you like them sunny-side up (no flip) then reduce your heat to low so the yolks heat thoroughly and your whites don’t burn.  If over-easy is your style, then try this quick trick for flawless-looking eggs: once the whites start to take on a solid form, add one tablespoon of water and lid the pan.  Keep the flame on for about 30 seconds, and then turn it off and keep the lid on for another minute or so to reach your desired doneness.  The steam will cook the top of the eggs, and the residual heat will bring the yolks to the doneness you desire – one minute will take you to over easy and another minute to over medium.


Slide the eggs on top of your sandwich and serve (if you’ve got guests) or dig in!

For the fancy, bistro brunch touch, toss baby greens with lemon juice and olive oil for a simple side salad.  And to make it a real NYC brunch, pour yourself a glass of Prosecco and add a splash of OJ.  (But if you’re drinking during the day, please have company.)

Voi la!  Croque Madame!  Bon appetit!

Where’s my breakfast?

If you’re bored with brunch, which may never happen, a great way to get quality time with a friend is to make it at home.  All you need to pack up is a few ingredients and travel to your buddy’s apartment and make a mess of their kitchen.

With fall in the air, I was inspired to make pumpkin pancakes for a catch-up breakfast with a good friend of mine.

You’ll need to pre-measure one and a quarter cups of all purpose flour, two teaspoons of baking powder, two tablespoons of light brown sugar, one quarter teaspoon of salt, one teaspoon of cinnamon, one quarter teaspoon of ground ginger, and one quarter teaspoon of ground nutmeg.  Put everything in a resealable bag for easy travel.  Additionally, you will need one large egg, one cup of milk, two tablespoons of melted butter, one teaspoon of vanilla, and one half cup of canned pumpkin.

Once you’re on location, mix your wet ingredients together and with dry.  For thinner pancakes, add a little more milk.

Heat a skillet or griddle.  Melt butter on the surface to coat, and pour roughly one half cup of batter to make your pancakes.  Once they start to bubble and dry around the edges, they are ready to be flipped.  Serve with your favorite topping.  I used fresh whipped cream (with cinnamon and creme de cacao) and maple syrup.  You could also add diced apples to your batter for another deliciously fall touch.  Enjoy your sweet breakfast treat and the great company!

Bring wine! (I’ll cook!)

An intimate (and cheaper) alternative to going out to eat with a group of friends is what my circle calls “family dinner.”  In NYC, $20 will get you a glass and a half of wine in most decent restaurants.  With family dinner, that same $20 bill buys you two bottles of decent wine to bring to your host or hostess’s apartment for an evening of certain entertainment.

As the host (and dinner maker) you can probably get away with spending the same $20 that your guests are using to stock you bar for the evening.  Tonight’s dinner is maple brined pork chops with melted bleu cheese and honeyed figs.  (Ok, this one sounds fancy and might cost you more than $20, but you can cut out some items and still have a delicious dinner, or take turns with who is hosting and everything will even out in the end.)

Start the night before with your pork chops, as brining will take some time.  If you’re in a crunch, the morning of will work just fine.  Bringing is the process of soaking meat in salted water for a long period of time to infuse flavor and extra moisture into the meat.

Bring two cups of water to a simmer and mix in a little less than one half cup of kosher salt and one half cup of granulated sugar.  Stir until the salt and sugar has dissolved completely and remove from the heat.  Add roughly four cups of ice cubes.  This will cool down the brine so you can use it sooner, otherwise, add four cups of cold water and allow to cool in the refrigerator.  Pouring the hot brine over the pork chops would be bad – the heat would raise the temperature of the pork to a level where bacteria can begin to grow.

From here, you can add other flavorings.  Since we’re making maple brined pork chops, add one half cup of maple syrup.  I also added two tablespoons of whole peppercorns and three cloves of crushed garlic.

Line your pork chops in a container that can be covered or sealed.  It would be ideal to use a Tupperware-type container, but if you don’t have that, make sure that the container is deep enough so you don’t spill.  Keep in mind, too, that the meat will expand as it absorbs some of the brine, which may cause some overflow.  (Learned from experience here – this was big mess in my fridge.)

For your pork, get a thick-cut chop with the bone in (makes for a little more flavor and a much nicer presentation) about one and half inch thick.

To cook, remove the pork chops from the brine and pat dry with paper towel.  Line a sheet pan with foil (for easy clean-up) and put the pork chops on the pan with a couple of inches spacing between each chop.  Place the chops into a pre-heated 400 degree oven for roughly 25 minutes, depending on the thickness of your chops.  The long-time standard internal temperature has been 160 degrees.  Pork isn’t the “dirty” meat that it was once thought to be.  You’re safe now around 145 degrees, or 150 if you don’t feel comfortable there.

Melt some bleu cheese to pour over the top.  You’ll be best off doing this in a microwave safe bowl and with a soft, creamy cheese (not a crumbly bleu cheese you’d see in a salad).  There may be a little separation after melting, but it will still be delicious.

The perfect accompaniment to this dish is honeyed figs.  The sweetness of the figs will pair perfectly with the saltiness of the pork and the sharp bite of the bleu cheese.  Take one pound of fresh black figs and cut in half and remove any stems.  Add them to a saucepan with twelve ounces of honey and one quarter cup of red wine.  Simmer until the figs are soft and the sauce syrupy – about one hour over medium heat.

Pick your favorite sides – I used mashed potatoes and roasted brussel sprouts – and serve and enjoy.

Simple comfort

Everyone likes chicken.  Hopefully you have some fond memory of a roast chicken that reminds you of a homey family dinner, with grandma pulling a perfectly browned bird out of the oven and setting out a bowl of mashed potatoes and gravy.  (Or, I could be recounting a past trip to Boston Market.)  Either way – this recipe is not just your grandma’s chicken.  It’s going to be easy, but there are a few twists from the traditional meal you grew up with.  When you’re done cooking, you’ll have roasted chicken quarters and caramelized fennel with bleu cheese mashed potatoes and lemon green beans.

Start with your chicken – dark quarters (that’s the thigh with the leg attached) with skin on.  You should figure one quarter chicken per person, as everyone will not be able to stop eating this delicious piece of poultry.  First, marinade the chicken in one quarter cup of olive oil, the juice of half a lemon, two tablespoons of whole grain dijon mustard, two chopped garlic cloves, and one teaspoon freshly ground pepper.  Mix the marinade in your baking dish (this will make for one less item to clean up) and toss the chicken so that it is coated.  Leave to marinade in the refrigerator for about one hour.  You could also do the marinade in a reclosable plastic bag.

Continue with your prep work…wash and cut approximately three pounds of red skin potatoes and cut in half (or smaller to reduce cook time).  Place in a pot and cover with water.  Set this aside and continue with your fennel (also called anise).  Remove the tops from one large fennel bulb and cut the bulb in half to remove the core.  Slice thinly.  This may look like a lot, but it will cook down significantly.

Once your chicken has been soaking up the flavorful goodness, remove from the baking dish and layer the fennel on the bottom of the dish.  Place the chicken on top of the fennel skin side up and put the pan into a 375 degree oven.  The juices from the chicken will drain into the fennel, creating an explosion of flavor.  Set a timer to check back in about 45 minutes.

While your chicken roasts away, start cooking your potatoes.  Depending on the size, they will need to boil for 25 to 30 minutes.

Hopefully you bought those fancy, already cleaned, fresh french green beans (haricot vert) and you just need to open the bag.  Zest one lemon, and toss with your beans on a baking sheet along with a drizzle of olive oil and salt and fresh pepper to taste.  Set this aside so it’s ready to go in the oven when your chicken is almost done.

Once your chicken has been wafting scrumptious scents throughout your kitchen for 45 minutes, give it a check.  The final internal temperature needs to be 165 degrees Fahrenheit, and for it to be pleasing to the eye, it should be a golden brown.  With a large spoon or baster, put some of the juice from the bottom of the pan on top of each piece of chicken.  This will add some more flavor, as well as help the chicken to get some color.  Place your beans in the oven at this time and set the time for 15 minutes.  If your chicken is not close to temperature, you can crank up the heat at this time as well, which will also help with the golden brown color.

The potatoes are cooked by now, and you can drain the water.  You can check for doneness with a fork – if it goes through easily, they’re done.  Put the drained pan back on the stove for about one minute to cook off any of the excess water that did not pour out; no one likes watery mashed potatoes.  Add four to six ounces of bleu cheese (or gorgonzola or roquefort or stilton – they’re all pretty much the same but from different countries) and two tablespoons of butter.  Put the lid on the pot for a couple of minutes so that the heat from the potatoes softens the cheese and melts the butter.  I would usually add cream or milk to my potatoes, but the creaminess of the cheese smoothes them out quite nicely, so I don’t think it’s necessary for this dish.  Add salt and pepper to taste and mash away.

After the last fifteen minute timer goes off, you should be ready to go and plate your meal.  Serve up a pile of mashed potatoes, some of the roasted fennel underneath the chicken, and the still crunchy yet ever so delightful beans, and your dinner guests will be dying for seconds.  And thirds.


A delicacy beyond delicious…

After two weeks of vacation, I have found the perfect recipe that would please any crowd.  This dish is perfect for a summer party on the deck or comforting meal when you’re stuck inside on a cold day.

Get ready to make hotdog casserole.

A good friend introduced this recipe to me as we celebrated our final night of vacation.  We thought the most appropriate meal to crown our visit to a classy place like Martha’s Vineyard should include a pricy cut of whatever meat is in a hotdog.  Enjoy.

Ideally, you should have a nine by thirteen inch pan, with eight standard white hotdog buns and eight hotdogs (your choice).  We had an oven-safe skillet, so some improvisation was required.  The tools you have should never hold you back from culinary creativity.

The quantities in this recipe are totally up to you and your taste, so I will only share the ingredients and the rest is up to you.

Open each hotdog bun and spread with mayonnaise, mustard (dijon works very well) and relish.  Place your hotdog in the bun and put the bun in a pan the has been sprayed with a non-stick spray.  Repeat this step seven more times to fill the pan.  Squirt ketchup on each hotdog and spread on you favorite canned chili.  Add a generous amount of cheese over the hotdogs and wrap in foil.

Bake in a 350 degree oven for 45 minutes.  The chili will absorb into the bun and the cheese will be delightfully gooey.  Scoop each hotdog out for serving.  Feel free to be inebriated when consuming.

Once you’ve started your guests off with a drink, it’s time to serve some appetizers.  Something that you can throw together as your guests enjoy a cocktail is best – you don’t want to stay away from the party for long!  To make something “fancier,” choose a recipe that you can prep ahead of time, and then assemble in just a few minutes.

Try a play on the simple insalata caprese served on a polenta cracker – sort of a caprese canapé – with fennel for a creative twist.  Start by making the polenta for your crackers.  Bring three cups of chicken stock to a boil and add two cups of yellow cornmeal, whisking constantly to break up any lumps.  Stir in one half cup of grated parmesan cheese and one teaspoon of ground pepper.  Allow to cool slightly.  Place one half of the mixture on a sheet of parchment paper and roll the paper around the polenta to create a log shape.  If you do not have parchment paper, you can use aluminum foil, but transfer to plastic wrap once rolled for cooling.

Place in the fridge to chill.  While your polenta is cooling, make your topping.  Start with one half cup of balsamic vinegar in a small saucepan over low heat.  You’ll be making a balsamic reduction to put on top of the canapés.  Thinly slice on fennel bulb and one half of a small red onion and set aside in a bowl.  Toss with two tablespoons of salt and allow to sit for fifteen minutes.  The salt will draw the water out of the fennel and onions to make them wilt.  Seed and julienne (that means slice in thin strips) four medium-sized ripe tomatoes and crush two cloves of garlic.  Squeeze as much water out of the fennel and onions as you can and add to the tomatoes and garlic. Add one half cup of chopped fresh basil.  Toss with two tablespoons of olive oil and add freshly ground pepper to taste.

Once cooled, unwrap and slice your polenta logs into half-inch discs.  These will be your crackers.  Place on an oiled sheet pan, and brush the top of the crackers with olive oil.  Place in a 350 degree oven for about fifteen minutes to brown the tops.

Arrange your polenta crackers on a plate and top with a slice of fresh mozzarella.  Place a spoonful of the tomato/fennel mixture on top and drizzle with balsamic reduction.  All of these items can be prepared ahead of time and assembled when you are ready to eat. Serve and enjoy!

Brunch: the most important meal of a Sunday

Sunday, or Sunday Funday as it is more commonly known, is a day to celebrate the feast of brunch.  Going out for brunch is always fun, but every once in a while, it is always nice to gather a group of your closest friends and feed them.

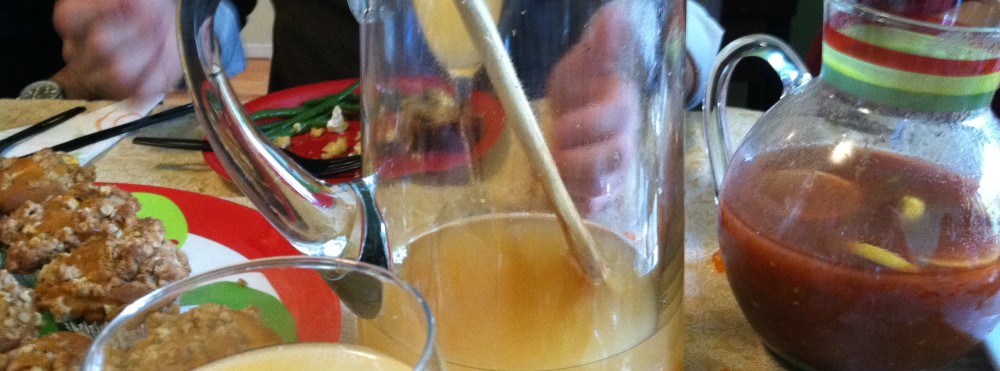
Start with drinks and snacks.  The easiest way to handle drinks to to set up a bar.  I recommend a savory drink and a sweet drink; my “go-to” to a bloody mary and a mimosa.

The best bloody mary is well-marinated.  Start about a day ahead with 1 gallon of clamato juice and one quart of tomato or vegetable juice (I like to use Hot and Spicy V8).  Add two tablespoons of dill weed, one tablespoon of celery seeds, two teaspoons of celery salt, one tablespoon of onion powder, and six tablespoons of wasabi powder.  Splash in about two tablespoons of worchestershire sauce and one teaspoon of fresh ground pepper.  Here is the interesting part: add two cups of pickle juice and one cup of banana pepper juice.  It you want to get fancy and use the juice from your own homemade pickles, check out the recipe tab – it makes all the difference in the world.

Mix everything together well, making sure that there are no clumps of any dry ingredients.  If you want a little more heat, add some of your favorite hot sauce, but be careful, as the flavors will intensify (wasabi included) as the mixture sits.  Allow at least twelve hours before consumption.  Fill a tall glass with ice and enought of your favorite vodka to get the party started.  Add bloody mary mix and garnish with a homemade pickle spear and bleu cheese stuffed olives.

For your guests that are looking for a sweet drink, you can never fail with a mimosa or a variation.  Mix any fruit juice with your favorite bubbly (don’t splurge here – an inexpensive prosecco will do) and you have a delicious brunch cocktail.

A delicious summer twist on the classic mimosa is a lemon blueberry mimosa.  (You will almost never go wrong mixing lemon with bubbly.)  If you’re hosting a fair amount of people for brunch, I suggest going with a pitcher; it will go well with your bloody mary bar.  You will need roughly one half cup of lemon blueberry syrup to two bottles of bubbly.

To start, make your lemon blueberry syup.  Start with the beginnings of a simply syrup – one cup of granulated sugar and one cup of water in a medium saucepan over medium heat.  Add one half cup of fresh lemon juice (about three lemons worth of juice) and one tablespoon of lemon zest.  Pour in one bag of frozen blueberries (12 oz) and cook for twenty to twenty-five minutes.  You don’t want the syrup to thicken completely, but a little extra consistency should form.  From here, you can either strain out the whole blueberries, blend them and strain the juice back into your syrup, or go “au naturale” and have some character in your mimosa.

Mix the one half cup of the syrup with your bubbly, serve, and enjoy.  If you’d like to add more berry flavor, pour roughly one quarter cup of blueberry flavored vodka into your pitcher and add a splash of sparkling water (you don’t want to get your guests hammered after one drink).

Enjoy your drinks!  Come back soon with an appetite to start working on hors d’oeuvres!

P.S. This is a great “bring this!” event.  You can provide the eats, and your friends can each bring a bottle (or more) of bubbly for the drinks.

A summer picnic, continued…

Now that you’ve made your drinks, you can move on to the snacks.  I find that it is best to keep it simple, but use interesting ingredients to make your food seem like it took all of the creativity and prep time in the world.

Cheese and crackers will never fail you (unless you’re sitting in direct sunlight for a prolonged period of time).  Most cheeses are best served at room temperature, so you don’t need to worry too much about packing them on ice, but you do need to be careful if you are sitting in the sun – your cheese will become a perspiring, melted mess, or, maybe I just invented the eco-friendliest nachos.  Try to pick up something other than your standard cheddar (though a well-aged one would be a good choice), and get creative with your crackers – a fresh baguette goes great with cheese, and spread on some pesto (store-bought if you must) and you’ve just made a fancy snack.  I found a delicious blueberry-vanilla goat cheese that was absolutely delicious and impressively interesting.  Go for cheeses like that and you will be sure to impress without much effort.

Prepare a simple sandwich or wrap for your main course.  I’ve done some pretty great things with flatbread.  Lay out one flatbread and spread with hummus, leaving about one inch on one side of the bread uncovered, otherwise, you’ll get hummus squishing out of your wrap once you roll it.  There are so many different varieties out there (if you’re not making your own), so here would be a good place to experiment with different flavors to add a little something to your wrap.  Put some arugula or sprouts on top of the hummus, and then your meat.  I like to use roasted turkey breast.  Then, add cheese (another area to get creative – I used a tandoori gouda) and roasted red peppers.  Make sure you pat them dry before adding your wrap to avoid a soggy mess.  If you’re eating right away, you can go with tomatoes instead.

Roll tightly towards the end you left clean of food.  Layering and spacing the foods as in the picture will create a nice color pattern when you slice the wrap. 

Slice into two or so inch sections for sharing, and enjoy!  There are so many different things you can do with this to create a quick-yet-semi-elegant picnic snack!

‘Tis the season for a summer picnic

Summer is upon us, and it presents the perfect opportunity to pack some snacks (and a roadie) and sit outside and enjoy the sun and good company.  I’ll have a couple of entries over the next few days to get you set up for success.

The first item to think about is your traveling cocktail.  (Don’t forget to mind your state’s open container laws.  If you think that travel mugs were for coffee, you’re wrong.)  I would recommend a refreshing sangria.  In a large pitcher, mix two bottles of your favorite inexpensive white wine.  I prefer using a pinot grigio.  Add one half cup of Grand Marnier and 8 oz of fruit nectar – I usually use pear.  Mix together and add your fruit.  My favorite combination for this mix is grapefruit segments and raspberries.  The secret ingredient is one half teaspoon of ground cinnamon.  Leave in the fridge for a few hours before serving so that all the flavors can mix together nicely. Bring along in your “coffee” mug or store in plastic jug with the fruit on the side.

Another great way to get your BAC up is vodka-soaked watermelon.

Cut approximately one half of a seedless watermelon into cubes (enough to fill a gallon bag).  Pour on one cup of vodka and one cup of your favorite flavored liqueur.  I like to use pucker – watermelon compliments watermelon very well, but feel free to get creative!  Strawberry works well too.  Prepare your watermelon a day or so ahead of time to allow the liquids to soak into the watermelon.  This snack travels great on a picnic.

This concludes the booze edition.  We’ll make food tomorrow.